Using your Belgian eID as an authenticator for SSL-VPN using a Fortinet firewall

The Belgian eID card can be used for many things, one of which is authentication. It is a quite secure means of authentication since this eID card is about the last object you would share with anyone and seen its importance in Daily life, it is well guarded and cared for by its owners. The government vouches for its accuracy and that is well enough for our purposes. The only requirement is that we have an eID compatible smartcard reader at hand (external USB/built into the keyboard/onboard in laptops).
For more info : http://eid.belgium.be/en/
First we need to obtain the certificate information for the eID cards.
https://support.globalsign.com/customer/en/portal/articles/1426602-globalsign-root-certificates

The Belgian Root CA is not known by default:
 |
 |
I Called this the “CA_Cert_1. Cer” which I load first.
The Globalsign Root CA is usually known in a browser, but not on Fortinet. I call this “CA_Cert_2.cer” :


And finally the intermediate between the Root CA and its descendents “CA_cert_3.cer”


If you did not succeed in creating these certificates you can find them here ready to use.
Now load these certificates in the right order into your firewall. “SYSTEM” => “Certificates” => “CA Certificates” and click “import”.
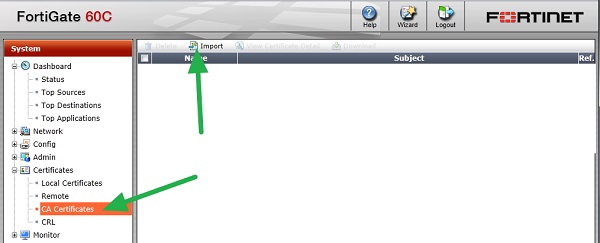
On the resulting screen check “Local PC” and click search.

Locate the saved files and click “OK”. Repeat this for the other two .cer files.

Creating PKI or peer users
A PKI or peer user is a digital certificate holder. A PKI user account on the FortiGate unit
contains the information required to determine which CA certificate to use to validate the
user’s certificate. Peer users can be included in firewall user groups or peer certificate
groups used in IPsec VPNs.
To define a peer user you need:
• a peer user name
• the text from the subject field of the user’s certificate, or the name of the CA certificate
used to validate the user’s certificate
The configuration page for PKI users in the web-based manager is not available
unless there is at least one peer user defined. Follow the CLI-based instructions to create
the first peer user. Optionally, you can then log into the web-based manager to configure
additional PKI (peer) users
You have a CLI available in the Dashboard – Status page.
Enter the following commands:
config user peer
edit peer1
set subject E=This email address is being protected from spambots. You need JavaScript enabled to view it.
set ca CA_Cert_1
end

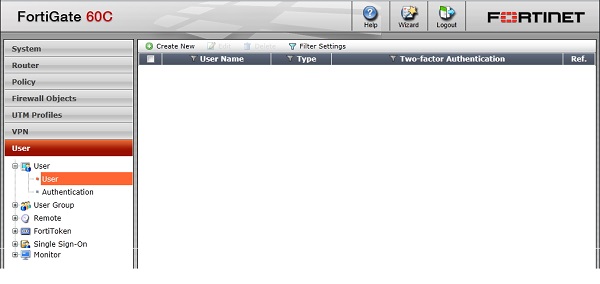
Now if you return to the previous page (enventually restart your brower to clean the cache) you will see a new user type called PKI.

The user we just created by command line can be removed. We only needed him to activate the PKI functions in the CLI.
The safest way to add new users in this list is to install the eID software and read the card for each user you want to add.

This results in a window that contains the information we are looking for:

Now we can fill this information in the corresponding fields on the Fortinet:

Note that we do not fill in any other field than Name and Subject.
When done, it’s time to make a group containing these new eID users:

